If you are in property management or a contractor pitching your services, the importance of conducting detailed building inspections cannot be overstated. A comprehensive inspection report is much more than a checklist; it’s a testament to an inspector’s expertise and attention to detail. Such reports instantly elevate your credibility among prospects, offering clear insights into the property’s condition, necessary repairs, and estimated costs. This level of transparency and professionalism not only sets your business apart but also serves as a powerful marketing tool, potentially leading to referrals and repeat engagements.
How To Perform a Commercial Roof Inspection
Performing a thorough commercial roofing inspection is essential for maintaining the integrity and longevity of the roof. GAF recommends at least one annually before storm season arrives. This process involves several key steps, each designed to assess different aspects of the roof’s condition and performance. Here’s an overview of the steps involved in a comprehensive commercial roofing inspection, why each step is taken, and its importance:
Starting Indoors: The First Defense Line
- Spot water damage by inspecting ceiling tiles and walls for stains or marks.
- Gather leak history from occupants or maintenance crews to identify patterns.
- If possible, check the roof deck’s interior for signs of moisture or damage.
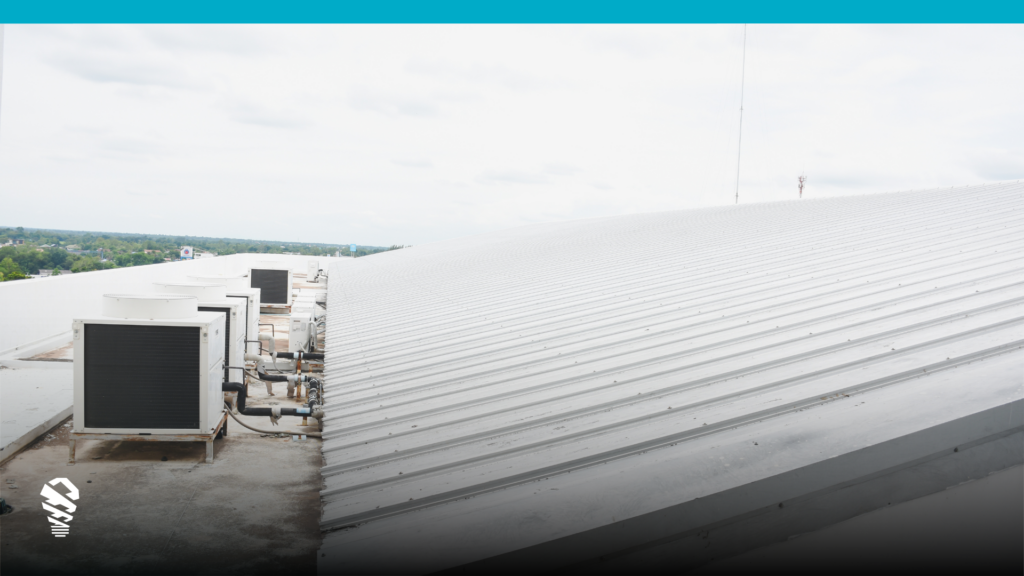
Outdoor Analysis: Where the Action is
- Initial Layout Review: Familiarize yourself with the roof layout and identify safety paths.
- Visible Damage Inspection: Look for cracks, blisters, and punctures in the roofing material.
- Drainage System Evaluation: Check gutters and downspouts for blockages.
- Flashing and Seam Integrity: Inspect flashings and seams for leaks or damage.
- Penetration and Equipment Check: Ensure vents, skylights, and HVAC units are sealed and secure.
- Water Ponding Investigation: Identify areas of water accumulation.
- Hidden Issue Detection: Use tools like moisture meters or infrared cameras for hidden moisture or insulation problems.
- Documentation: Take photos and notes of findings.
- Flashings: These crucial elements need checking around edges and penetrations for signs of failure.
- Drainage: Clean gutters and spot areas where water may pool, as this can degrade the membrane over time.
Pro Tip: Utilize IMGING Inspect to document these steps with geo-tagged photos viewable over a satellite image of the property and time-stamped as a visual record of the roof’s condition.
Leak Investigation and More
- Utilize moisture detection tools to locate leaks.
- Evaluate past repair work for its durability and effectiveness.
- Inspect equipment and roof accessories, such as HVAC units and skylights, for proper sealing.
Deep Dive: Core Sampling
- Core samples can reveal the condition of underlying layers like insulation and the roof deck, highlighting areas needing urgent attention.
Wrapping Up: Analysis and Reporting
- It’s your time to shine. Each inspection should result in detailed report that is more than a documents – it’s a showcase of your experience, judgement, and thoroughness. It’s your opportunity to present a comprehensive narrative enriched with your experienced insights. As a property inspector, these reports are your deliverables and represent your work to the client. They are pivotal in not only ensuring efficient maintenance and planning for future work but also in securing business – depending on your relationship to the property owner. If done right, they position your services services as invaluable and trustworthy, thereby winning more contracts and fostering long-term relationships.
- For polished inspection reports, use IMGING Inspect. It makes it easy to compile comprehensive reports, complete with photographs and detailed findings, making it easier to plan repairs or replacements and maintain the property efficiently. Geotagged photos are displayed in the app or your reports over a Google earth snapshot from above of the property. This provides valuable context for any report reviewers. For more on the reporting features in IMGING, visit this website.
Next Steps Proactive Maintenance or Job-Winning Bid
- At this juncture, it’s turn to turn your inspection report into your biggest sales asset, or establish a maintenance schedule to regularly inspect and care for the roof moving forward.
Conclusion
These steps to perform a commercial roofing inspection are not merely an exercise in problem detection but an essential strategy in asset preservation and management (or once again, business development). Through diligent assessment and proactive maintenance, this process ensures the structural integrity and safety of the commercial edifice, safeguarding its legacy against the relentless march of wear and decay.
With the advent of IMGING by Loveland Innovations, this process is revolutionized. Whether by drone roof inspection with IMGING flight or mobile inspections with IMGING Inspect, inspectors can now create a “living property profile,” where the essence of each inspection is captured and stored in one location, accessible through an intuitive iOS app. Its ability to consolidate multiple inspections into a single, evolving property profile ensures that every detail, every change, is meticulously documented and easily accessible. This isn’t just about spotting problems; it’s about embracing a future where property inspections become a seamless, integrated task of the digital age.


